Friday, November 14, 2014

Presentation to Senn High School Students

This last Monday, Susanna and I presented about green roofs and our experiment to three groups of ecologically minded Senn High School students.


We prepared our talk for two weeks before hand and were rewarded with three great sessions. Of course there were a few students who were falling asleep (tip: if you're going to sleep, don't sit in the front row), but most of the students seemed interested and engaged. I was nervous before hand, and at times the talk got a little bumpy, but over all it was really rewarding when I could catch someone's eye and they were like, "hey, I'm listening to what you're saying, and I like what I hear."
Here are some of my favorite slides:


Wednesday, October 15, 2014

Thermochron Replacement and Soil Sample Collection

Two weeks ago, Susanna and I made our way back to the green-roof after an unintentional hiatus. The time had come to change out the thermochron ibuttons. They can hold 2048 temperature readings meaning we could leave them out for about 12 weeks before needing to retrieve the data by connecting them to the computer. After downloading the data and starting new missions for each thermochron, we replaced them into their respective trays.

Susanna replanting the thermochrons.
Because we were both out there, we decided it was the best time to collect the soil samples that we both will need for our lab tests. Susanna will be testing the water retention capacity and I will be measuring soil carbon and nitrogen levels. We collected 100 mL of soil from each of 40 trays, giving us more than enough lab work to grind through in the coming weeks.

Me, posing while collecting soil samples.
The plants are looking pretty good:

Green-roof trays of prairie plants.

 Here are some action shots from the afternoon.

Planting thermochrons
Thermochrons and soil collection
Soil collection

Friday, September 19, 2014

Fall Green Roof Research Intro

My focus of our project is on soil carbon content. I have two experimental questions. First: will added live versus sterile inoculum promote an increase in soil carbon? Second: do sedum species versus native prairie plants lead to higher soil carbon levels? To answer these questions I must be able to accurately measure the carbon in the soil. My goal this semester is just that: get reliable soil carbon data for our experimental trays by using the Flash CN Analyzer. 

Before I can run our real samples, I have to practice preparing samples and running standards and samples with the analyzer using excess soil. This coming week, Susanna and I will collect the end-of-season soil samples for our experiment. From there I will need to grind the soil, finalize the Flash analyzer protocol, and begin running samples.  The Flash Analyzer, which I described in detail in a previous post, is intimidating, but I am excited about the potential data sets we could get; that is if I can get good at using the machine.

This semester, I also want to work on scoring the MIP root slides for our mychorrizal data, but this is secondary because the slides are easily preserved where as I need the carbon data to continue my project. I am also looking forward to helping Susanna with her project which deals in part with soil water retention. 

Summer Green Roof Research explanation

Susanna and I assisted with Kelly Ksiazek’s experiment that had two main questions. The first: does adding live versus sterilized prairie inoculum increase mycorrhizal fungal relationships and promote plant growth. The second: do native prairie plants function better as green roof organisms than traditional sedum species in terms of growth and green roof services provided.
We set up a grid of forty trays filled with soil substrate on the Quinlan Life Science terrace. Life prairie inoculum was added twenty trays and sterilized prairie inoculum to the remaining twenty trays. The inoculum was collected from a local prairie, half of which was sterilized to kill all bacteria and fungi.
Of the forty trays, ten were planted with sedum species, ten with prairie species mix A, ten with prairie species mix B, and ten remained unplanted as the control group. The ten trays of sedum were ordered from the green roof distributer and re planted in the experimental trays. Prairie mixes A and B contain different species of native prairie plants, grown in a greenhouse before planted in the trays. The control trays contain live and sterile inoculum but no plants.
Over the course of the summer we took measurements of plant growth, substrate temperature, soil stability, and soil carbon content. For the plant growth data, we measured month to month the individual plant’s max height, tray coverage area, and flower and fruit number. To measure the tray substrate temperature we inserted a thermochron in the center of each tray. These thermochrons were calibrated to take a temperature reading every hour for an extended period of time. Soil stability was measured using the soil slake test procedure. Soil carbon content was measured by ashing the samples in a muffle furnace. Future soil samples will be measured using the Flash soil carbon and nitrogen analyzer.

Friday, July 18, 2014

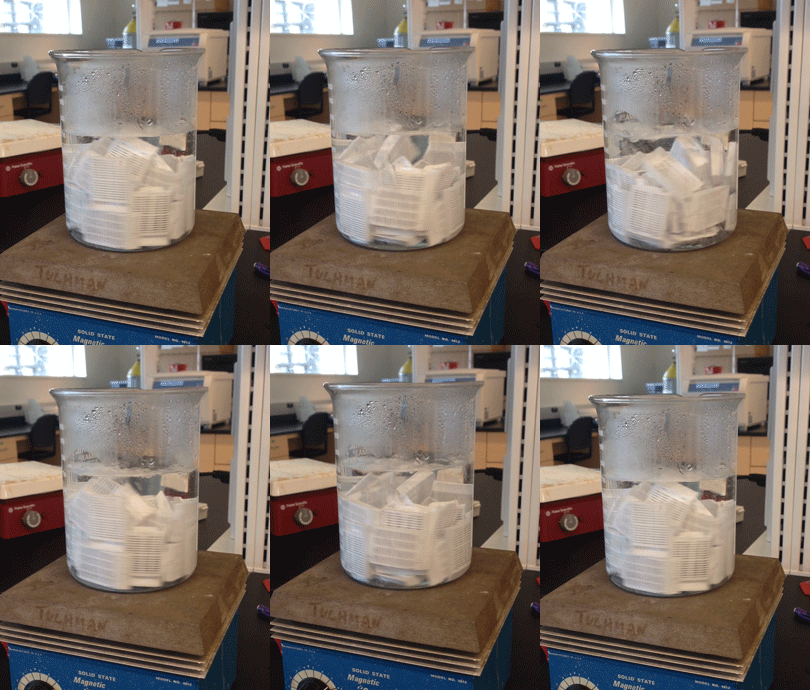
Possessed beaker!


After staining the roots, I had to sterilize the tissue cassettes by boiling them in water for a while. I added a stirring rod to the mix so the cassettes would stir themselves. It took some careful adjusting, but i got that beaker spinning like nobody's business. Also, first gif ever!

Thursday, July 17, 2014

Root Staining

Yesterday, we began staining our MIP roots we had collected and washed over the last few weeks. Luckily for us, the new arbuscular ink and vinegar procedure is really simple compared to old fungi staining techniques. At its core, the procedure is only two steps. The first being boiling the roots (in tissue cassettes) in 10% potassium hydroxide (KOH) for 3-5 minutes. This clears the root cells of their contents, leaving the cell walls and fungi unharmed.
Boiling the roots in the 10% KOH solution.
The second major step is boiling the roots in a vinegar and ink solution for 3 minutes. This stains the fungal tissue within the cells, making it possible to see the hyphae (regular fungal body tissue) and vesicles (reproductive capsules).
10% KOH on the left hotplate and vinegar/ink on the right.
Intermediate steps include removing the cassettes from the hot solutions and rinsing them with water several times. Washing after the first step rinses the remaining KOH from the roots. Washing after the second step initially rinses the excess ink which will leach from the roots.
Susanna removing the cassettes from the solution into water.
Because we are boiling the solutions, the beakers and hot plates obviously get really hot. We got the chance to open and use our brand new thermal safety gloves. They are thick, orange, and terry cloth. Embarrassingly, this is the first pair of elbow length gloves I've ever worn.
Me, looking snazzy and being safe.
Our final product is a beaker full of stained roots, all ready to be mounted on slides. We are temporarily storing them in a beaker of water with a splash of vinegar in the fridge.
Purple haze, all in my roots.

Wednesday, July 16, 2014

Flash C&N Combustion Analyzer

Last week, we got a surprise present for the lab (surprise for me at least). A brand spanking new Flash Carbon and Nitrogen Combustion Analyzer!  The C&N combustion analyzer does just that: it analyzes the carbon and nitrogen in a sample by burning it at 980 degrees celsius and then 850 degrees celsius until the sample is completely vaporized. I know, pretty hot, huh?
The Flash C&N Combustion Analyzer.
Those two shiny cylinders are the furnaces. They get very hot, as hot as an iron at high temperature. I should know, I couldn't resist (everyone was doing it!). The white tube with red caps is the moisture trap, and the large box behind it is the detector.
Our auto-sampler with two carousels.
This is the auto-sampler. It holds the samples and drops them into the first furnace. Our auto-sampler can hold four carousels- 100 total samples! In the main part of the sampler, there is a piston that pushes the sample into the chrome tube underneath that leads to the furnace.
A carousel with 11 samples loaded.
The Flash analyzer can only process samples that are between about 5-100mg. That's very small. Unfortunately, to get acurate results, we have to buy a new balance for the lab that is accurate to the 0.01mg. Our current balance, that we just got at the beginning of the summer, is only accurate to the 1mg which is apparently not good enough for the Flash analyzer (well, la dee da). Once the sample is massed out in a small tin cartage, it must be balled up to fit into the machine.
Susanna, making a perfect sample ball.
In the first 15 seconds after the sample is dropped into the first furnace, an eerie red light flashes and glows from the eye of the auto-sampler. This is the reflection of the sample combusting at almost a thousand degrees celsius.
The burning eye of the auto-sampler is watching.
When the samples have finally dropped into the furnace, vaporized, and gone through the detector, the computer spits out this:
The not-so-impressive-looking C&N data.
It doesn't look like much, but the area under the peaks (the integral) tells us quantifiably how much nitrogen and carbon was in the sample. The first peak is the amount of nitrogen detected and the second peak is the amount of carbon detected. Once you understand the process and what the graph means, it actually is pretty awesome. You know, for nerds like us.